I used Reeder for reading all my RSS feeds ever since the app launched over fifteen years ago. RSS is how I keep up with everything in the world outside and having a pleasant reading experience is very important to me.
It no longer serves that need for me.
For a long time, the way the app worked aligned with the way I want to read. Earlier this year though, the developer decided to take the app in a different direction, with a different reading experience. The older app is still available as Reeder Classic, but only a few months of use have shown me that the app is basically abandoned. The attention to detail is obviously now being applied to the new app.
Enter ReadKit.
I had used it briefly during the Google Reader apocalypse when every feed reader was scrambling to find new backends to sync to. Reeder similarly had switched to local only mode and was taking a while before it supported other services.
ReadKit in the meanwhile already had support for Feedwrangler, and so I switched to it until Reeder came back to speed.
And I’ve switched to it for the foreseeable future.
It looks beautiful!
It does everything I want, shows everything the way and want and behaves just the way I want it to. The only knock I have against it, is that it does not feel as fluid as Reeder does. But that’s nothing compared to the constant launch and relauch dance, I have to do with Reeder nowadays. Consistency and stability matter a lot to me.
Even better, it syncs natively with Miniflux, the service I use to actually fetch and read RSS feeds on my Linux desktop. No more Google Reader API!
This is a list of all my categories (with one of them expanded, click for a larger view)
and this is a list of unread articles in a feed, alongside one that is open (once again, click to enlarge if you want to see details)
That gnawing feeling has now gone away from the back of my brain.
The experience of reading and catching up with the world is once again a glorious experience thanks to ReadKit.
Ever so often, after one of my reading updates on social media, some of my young friends ask me how I get so much reading done.
So, I decided to answer it here for posterity and then just point folk here.
You are not me.
a. I am a book worm.
b. I am much older than you, with lots more practice.
You most probably want to rush through a hard, technical book.
a. I find them as hard as you.
b. I read them at, as slow a pace as you.
c. I interleave the hard stuff, with a lot of easy, “I-Love-This” fiction
Speed Reading is Bullshit!
Once you read a lot of books, you can pattern match and speed up or slow down, through whole blocks and paras and chapters and pages.
Reading for studying’s sake is work and unavoidable and not quite related to reading for reading’s sake.
a. These I pucker up and do anyway, just like taking bad medicine.
The only things that matter, when it comes to reading are …
And the trick to reading a little every day is to, make it a habit.
Be curious. Read whatever you want. Read whenever you want. Read wherever you want.
Quit Books.
You don’t have to finish it. You don’t have to slog through it.
Set it down. Come back to it, tomorrow … or in a few decades.
Or just throw it out and forget all about it.
Mostly me. Also other grizzly sysadmins who are learning devops like me.
One thing that bit me when I was trying to expose my apps to the world when working on the home cluster, is that Kubernetes on bare metal—I was using Kind at the time—expects to talk to a load balancer service, which then talk to an actual load balancer. Which if you are using bare metal, you won’t usually have.
I had to then go expose a “NodePort” to gain access from outside.
So to expose my stuff in as “real world” a way as possible, we need to:
Either install a load balancer implementation like MetalLB. OR
Use a Kubernetes distribution that has a load balancer implementation built-in, like K3s.
I chose option 2 and used K3s, because I am, as they say in popular parlance, using Kubernetes at the edge.1
In which case, I prefer to have as many batteries built-in as possible.
Mostly me. Also other grizzly sysadmins who are learning devops like me.
Problem
My main SSD is too small to hold all my kubernetes and K3s shenanigans. (It’s only about 512gb)
So I need a way to move my K3s data folder out to my big HDD.
Solution
Caution
Before you do any of the following, make sure to stop the cluster with: sudo systemctl stop k3s
K3s supports having a custom data directory, by letting me specify a data-dir.
I decided to specify it in the K3s config file at /etc/rancher/k3s/config.
If it isn’t there (as it wasn’t in my case), just create one. You’ll need to do this as the root user.
This is what I now have in there.
data-dir: /BIGHDD/rancher/k3s
And then, I …
Created a rancher directory in my big hard disk. (root owns it)
Ran rsync as the root user: rsync -a /var/lib/rancher/k3s/ /BIGHDD/rancher/k3s/
Started up my cluster again with a sudo systemctl start k3s
Well the title is a clickbait,but it’s true in a limited sense.
If you've written some C code you've probably used most of the features in C like structure,functions,pointers,arrays and perhaps even the preprocessor.
However, I will talk about one of the lesser used features in C – union
The Union
A union allocates a single shared block of memory, large enough to hold its largest member (with some padding, depending on alignment).
Unlike a struct, which allocates distinct memory for each member, a union allows multiple members to occupy the same memory space.
Here, both the integer, float, and character array occupy the same memory region.
When "HelloWorld" is copied into the character array v, reading that memory as a float outputs the string "HelloWorld" typecasted into float
a short essay on union.
But why do we need union ?
Why to allocate memory for only the largest member and not all of them using struct ?
A union is valuable when you want different interpretations of the same memory.
Using a union, we can store both the integer representation and the byte-wise representation of an IPv4 address within the same space.
This approach eliminates the need for explicit bit-shifting or manual conversions.
Example 2: Unions in Embedded Programming
Unions are widely used in embedded systems to represent hardware registers that can be accessed both as a whole and as individual fields.
In this example, the same memory can be accessed as a single 32-bit register or through specific bit fields.
This design improves clarity while maintaining memory efficiency — a common requirement in low-level programming.
Example 3: A Glimpse of Polymorphism in C
Now coming back to the title , we can do something similar to OOP in C:
Here, the structure json_t can hold one of several possible data types — a string, a single byte, or an integer.
The active type is determined at runtime using the type field.
There are some issues in this , in C the types are not tightly enforced by the compiler , so if we do
myJSON.type = JSON_STR;// // instead of JSON_INT
myJSON.number = 97;
printJSON(&myJSON); // O/P: a
The output will be : a (the ascii charector of value 97)
I have a post in one section of my site, say notes and miscellanea
That is my canonical post.
But I also need it to show up in the work section of my site, possibly with a another name.
A Hugo alias in the yaml front matter does not work, since both sections exist and Hugo gets confused.
Solution
Make sure layouts/redirect/single.html exists within your Hugo folder structure and it contains just this line …
Then go create a post in your other1 section with the following metadata:
---
title: <Your title here>#date autogenerated by my archetype. if missing, add datedate: 2025-11-06T08:30:54+05:30type: redirecttarget: <url-to-redirect-to>summary: <Optional text, that will appear in the sectiones listing page>---
The date field is critical. The post might not appear where you expect it, if it’s absent.
If not date, then you might need to use weight. One of the two is needed.
In my case, the metadata looked like this:
---
title: "The Plan for My New Hetzner VM"date: 2025-11-06T08:30:54+05:30type: redirecttarget: /nm/2025-11-06/summary: Alone and helpless, like you've lost your fight ---
Done! You can see an entry for “The Plan for My New Hetzner VM” in my work section as you see in the pic below. Clicking that will redirect to the actual post in my Notes and Miscellanea section!
In last 6 months time, twice I had to get my work machine’s system board (the motherboard) replaced.
First for an “Integrated Graphics Error”. One day I got these very annoying beeps on my work machine, I ran a Lenovo Smartbeep scan using their mobile app, and it suggested to contact (immediately) Lenovo support and request for a system board replacement.
Second time, the Wi-Fi (infact all wireless) stopped working on my machine.
For a few weeks following the first system board replacement, I thought it was some wifi firmware mismatch issue on my OpenSUSE Tumbleweed (TW) machine.
Because TW is a rolling release, once in a while distribution upgrade breaks stuff, so its a normal thing.
But I remember for the first few weeks after the hardware replacement, the Wi-Fi worked sometimes.
The Network manager will detect it but then soon after, it started to drop entirely. And I would get “Wifi adapter not found”.
And then from last ~1.5 months, I have been relying entirely on an Ethernet for Internet on my work machine.
And that won’t work when I’m travelling (I know, I can get an external dongle or something, but still).
So, I tried booting with a live USB stick into a Mint Cinnamon machine, and it was clear, it’s not a TW issue. Mint also didn’t detect any wireless network - zero, nil, nothing.
(Not to say, over last months, when I thought it was a firmware issue, I had tried many things, lots around the iwlwifi firmware, but nothing worked. I have been eying many recent upstream kernel bugzillas related to iwlwifi and I was convinced it was a firmwae issue. And it wasn’t).
Now, very fortunately, Lenovo Premium Support just works.
(for me it did! Twice I contacted them in last 6 months, and both times an engineer visited almost on the next day or in two, basically as soon as they had the replacement component delivered to them.)
Both times, they replaced the mother board.
(My work machine is a ThinkPad Workstation and every thing is just stuck on the mother board, so any tiny chip dies and it requires a full system board replacement).
Both times when the mother board was replaced, it’s almost a new machine, only with the same old storage.
(Very very important storage. Because it still contains my old TW OS partitions and data, and all the precious system configurations which takes a very long time to configure again).
I did run backups before both replacements, but still it’s a pain if I have to do a fresh OS reinstallation and setup everything again, in the middle of a work week.
So, when the system board is replaced, I think it refreshes the BIOS, and my grub menu no longer sees the TW OS partitions and so it just directly boots into the mighty Windows Blue Screen screaming “the system can’t be fixed, and I need to do a fresh install”.
But don’t get fooled by that (not immediately, check once).
Chances are that the old OS partitions are still there, just not being detected by the Grub Bootloader.
And that was the case for me (both times).
And not to my surprise, the OpenSUSE TW “Rescue System” menu came to my resuce!
(well, to my surprise! Because let’s not forget, TW is a rolling release OS. So things can go south very very quickly.)
I did the following:
I created a live USB stick with OpenSUSE Tumbleweed.
(It helped to have a stick with a full Offline image, and not the tiny Network image which will pull every single thing from Internet.
Because remember “the Wi-FI not working on my machine”.
Well I could have connected to Ethernet but still, the lesson is to have a proper stick ready with an offline image so it should just boot.)
Now, put it in the machine, go to the “Boot Menu” (F10, IIRC), and pick the option to boot from the live USB stick.
It will go to a grub menu.
Skip all the immediate menu options like “OpenSUSE Tumbleweed installation”, etc.
Go to “More …” and then “Rescue System”.
It will do the usual “loading basic drivers > hardware detection > ask to pick a keyboard layout, et. al” and then give me the “Resuce Login:” prompt.
Remember the username is “root” and there is no password.
With that, I enter tty1:resuce:/ #.
Now run the following set of commands:
# first things first, check my disk and partitions
## (if they still exists, I move on. Otherwise, all is gone and nothing more to do)

fdisk -l
## gives me something like following (truncated ofcourse, to the important bits)
Disk /dev/nvme0n1: xx.xx GiB, xxxxxx bytes, xxxxxx sectors
Disk model: xxx PC xxxx xxxxx-xxxx-xxxx
Units: sectors of 1 * 512 = 512 bytes
Sector size (logical/physical): 512 bytes / 512 bytes
I/O size (minimum/optimal): 512 bytes / 512 bytes
Disklabel type: xxx
Disk identifier: xxxxxxx-xxxx-xxxx-xxxx-xxxxxxxxxxxxxx

Device           Start   End     Sectors   Size       Type
/dev/nvme0n1p1   xxx     xxxx    xxxxx     260M       EFI System
/dev/nvme0n1p2   xxxx    xxxxx   xxxx      xxx.xxG    Linux filesystem
/dev/nvme0n1p3   xxxxx   xxxxx   xxxx      2G Linux   swap

# in my case, the disk that has the OpenSUSE tumbleweed is "/dev/nvme0n1".
# "/dev/nvme0n1p1" is the EFI partition
# "/dev/nvme0n1p2" is the root partition
# "/dev/nvme0n1p3" is the Swap partition

# From this step onwards:
# I need "/dev/nvme0n1p1" (EFI System) and "/dev/nvme0n1p2" (Linux Filesystem)

# I need to mount these two partitions under "/mnt"
# (make sure the `/mnt` directory is empty before mounting anything to it)

cd /mnt
ls  # should be empty
cd ..

mount /dev/nvme0n1p2 /mnt
mount /dev/nvme0n1p1 /mnt/boot/efi

# next I need to mount "/dev", "/proc", "/sys", "/run" from the live environment into the mount directory

mount -B /dev /mnt/dev
mount -B /proc /mnt/proc
mount -B /sys /mnt/sys
mount -B /run /mnt/run

# now chroot into the "/mnt" directory
# the prompt will turn into `resuce:/ #` from the earlier `tty1:resuce:/ #`

chroot /mnt

# now make the EFI variables available

mount -t efivarfs none /sys/firmware/efi/efivars

# now reinstall grub2, with `grub2-install`

grub2-install --target=x86_64-efi --efi-directory=/boot/efi --bootloader-id=opensuse
## should output something like:
Installing for x86_64-efi platform.
Installation finished. No error reported.

# then probe for other operating systems on this machine

os-prober
## should output something like (and because my machine originally came with Windows, it still shows remnants of that)
/dev/nvme0n1p1@/EFI/Microsoft/Boot/bootmgfw.efi:Windows Boot Manager:Windows:efi

# now, create a new grub configuration file using grub2-mkconfig

grub2-mkconfig -o /boot/grub2/grub.cfg
## should output something like:
Generating grub configuraiton file ...
Found theme: /boot/grub2/themes/opneSUSE/theme.txt
Found linux image: /boot/vmlinuz-x.xx.x-x-default
Found initrd image: /boot/initrd-x.xx.x-x-default
Warning: os-prober will be executed to detect other bootable partitions.
Its output will be used to detect bootable binaries on them and create new boot entries.
Found Windows Boot manager on /dev/nvme0n1p1@/EFI/Microsoft/Boot/bootmgfw.efi
Adding boot menu entry for UEFI Firmware Settings ...
done

# If all good so far, exit out of chroot

exit

# Reboot the machine.
# And remove the installation media

reboot
As the system reboots (remember I have removed the installation media at this point), I go to the BIOS to confirm the boot order.
Now, I let it boot normally and it should give me a grub menu with proper “OpenSUSE Tumbleweed” boot entry.
And that should work like before.
Boot and login! (It did, twice I followed this process and it did).
(A note - When I reboot into OpenSUSE TW after this new grub config creation on a new system board, I need to also make sure that “Secure Boot” is disabled in BIOS menu.
Otherwise it will not allow the OpenSUSE TW to boot. It didn’t for me because my Secure Boot was enabled.
So, I had to disable it. And then it worked.
After first successful boot, I think I can enable it again.)
None of this process is my own making.
The whole credit goes to this very useful demo - How To Fix Grub in OpenSUSE | UEFI (KMDTech) (Thank you!)
It worked twice for me without a single hiccup.
(but ofcourse, if you need to follow, please do it carefully, after checking, cross-checking and understanding everything you’re typing.)
A few weeks back, I had to reset my router for firmware updates.
And because of that, some devices on my local network, in this case my HP printer stopped working on Wi-Fi.
I followed the following steps today, to make it work again.
(MJB helped lots! Thank you so much! Very grateful!)
I realised the IP (http://192.168.1.z) that was assigned to my HP Printer (before router reset) is now taken by some other device on my local network because of DHCP dynamically assigning IPs.
I connect to the HP Printer via Ethernet, access the HP Printer configuration page on the last assigned IP (http://192.168.1.z).
(Because now I am connected to the HP Printer via Ethernet, the router give preference to the HP Printer on the above IP, even though DHCP Server had assigned this IP to another device on my network.)
I login to my HP Printer configuration page.
I go to “Settings > Network Settings > Wi-Fi”.
On this menu page, click on “Wi-Fi Settings > Advanced Settings > Network Setup”.
Go to “SSID” and hit “Search List” and “Refresh”.
From the drop down, pick the Wi-Fi SSID I want to connect to, at the bottom, pick “Network Key Setup” and put the updated SSID password in there (both in “Network Key” and “Confirm Network Key”).
Don’t forget to hit “Apply”.
Now other thing I have to fix is that the IP address is still assigned by the Router’s DHCP server to another device on LAN.
I need to assign a proper IP to my HP Printer outside the range of IPs available to DHCP server to assign to devices dynamically.
For that, go to the Router admin page, login and go to “Local Network > LAN > IPv4”.
Then go to the section “DHCP Server” and change “DHCP Start IP Address” and “DHCP End IP Address” respectively to some “192.168.1.a” and “192.168.1.b” and hit “Apply”.
With this the router will now have IP “192.168.1.a-1” and DHCP server will only be able to assign dynamically IPs to devices within the assigned pool only.
(with this, what I am trying is to limit the pool of IPs available to DHCP server so that I can assign an IP (“192.168.1.b+1”) to HP Printer outside the limits of this available DHCP server IP pool manually. So, that the printer IP doesn’t conflict with any other device IP assigned by DHCP server.)
Now login back to the Printer configuration page, go to “Settings > Network Settings > TCP/IPv4”.
Here, in the “General” section, pick “Manual” under the “Assign IPv4 Address” option.
And manually assign the following - (1) “IPv4 Address: 192.168.1.b+1”, (2) “Subnet Mask: 255.255.255.0”, and (3) “Gateway Address: 192.168.1.a-1” (should match the router IP address) to HP Printer.
And hit “Apply”.
With this, the HP Printer configuration page itself will reload to the new assigned IP address url (http://192.168.1.b+1).
After above steps, I then remove the Ethernet from the HP Printer, restart it.
And check if I am still able to access the HP Printer on the assigned IP via Wi-Fi (http://192.168.1.b+1).
Yes! It worked now!
Then now I need to test, whether printing works on Wi-Fi.
I am on an OpenSUSE Tumbleweed machine.
I go to the “Settings > Printers” page.
I have to make sure that my printer is showing up there.
(It wasn’t before, I had to once manually add a printer and pick up the latest available matching model from the available database, but that’s not needed after my steps below.)
Yes, printer shows up. I gave a test print job. Printing on Wi-Fi is working now.
But Scanning still doesn’t work. Neither on Wifi, nor on Ethernet.
My system just doesn’t detect the scanner on my HP Printer at all.
Now, I go back to HP Printer configuration page (http://192.168.1.b+1).
Go to “Settings > Network Settings” and ensure that “AirPrint” and “Bonjour(mDNS)” both are enabled.
Now, I need to do a few things at the OS level.
Install (or ensure if already installed) the following set of packages.
# install required packages

sudo zypper install avahi avahi-utils nss-mdns
sudo zypper install hplip hplip-sane sane-backends
sudo zypper install sane-airscan ipp-usb

# enable, start and verify status of avahi daeomon (make sure I use `-l` flag to have all available information from the service status output)

sudo systemctl enable avahi-daemon
sudo systemctl start avahi-daemon
sudo systemctl status -l avahi-daemon.service

# make sure I have all avahi-related tools as well

which avahi-browse
which avahi-resolve
which avahi-publish
rpm -ql avahi | grep bin # gives me `/usr/sbin/avahi-daemon` and `/usr/sbin/avahi-dnsconfd`


# ensure firewall is allowing mdns and ipp

sudo firewall-cmd --permanent --add-service=mdns
sudo firewall-cmd --permanent --add-service=ipp
sudo firewall-cmd --reload
sudo firewall-cmd --info-service=mdns
sudo firewall-cmd --info-service=ipp

# and restart firewall

sudo systemctl restart firewalld
sudo systemctl status -l firewalld

# now check if avahi-browse can see devices advertised by my HP Printer

avahi-browse -a | grep HP
## output something like following. I need to make sure it has `_scanner._tcp` and `_uscan._tcp` showing up
  + wlp0s20f3 IPv4 HP Laser MFP 136nw (xx:xx:xx)                 _ipp._tcp            local
  + wlp0s20f3 IPv4 HP Laser MFP 136nw (xx:xx:xx)                 _scanner._tcp        local
  + wlp0s20f3 IPv4 HP Laser MFP 136nw (xx:xx:xx)                 _uscan._tcp          local
  + wlp0s20f3 IPv4 HP Laser MFP 136nw (xx:xx:xx)                 _uscans._tcp         local
  + wlp0s20f3 IPv4 HP Laser MFP 136nw (xx:xx:xx)                 _http._tcp           local
  + wlp0s20f3 IPv4 HP Laser MFP 136nw (xx:xx:xx)                 _pdl-datastream._tcp local
  + wlp0s20f3 IPv4 HP Laser MFP 136nw (xx:xx:xx)                 _printer._tcp        local
  + wlp0s20f3 IPv4 HP Laser MFP 136nw (xx:xx:xx)                 _http-alt._tcp       local
  + wlp0s20f3 IPv4 HP Laser MFP 136nw (xx:xx:xx)                 _privet._tcp         local

# if device shows up, then check is scanner is responding on the network

ping -c3 192.168.1.x

curl http://192.168.1.x:8080/eSCL # any xml ouput is fine as long as there's something

# final check

scanimage -L
## it should list something like:
device `airscan:xx:xx Laser MFP 136nw (xx:xx:xx)' is a eSCL HP Laser MFP 136nw (xx:xx:xx) ip=192.168.1.x
At this point, the “Scan Documents” app should be detecting the scanner on my HP printer (it did!)
Also, with Avahi working, my OS system “Settings > Printers” also got a HP Printer added automatically with the correct model name etc.
(Scanner also, although that doesn’t show up as a menu item in the system settings.)
This month I did the last meeting as a director of the Python Software
Foundation board, the new board already had their first meeting.
I decided not to rerun in the election as:
I was a director from 2014 (except 1 year when python's random call decided
to choose another name), means 10 years and that is long enough.
Being an immigrant in Sweden means my regular travel is very restricted and
that stress effects all parts of life.
When I first ran in the election I did not think it would continue this long.
But, the Python community is amazing and I felt I should continue. But, the
brain told me to give out the space to new folks.
I will continue taking part in all other community activities.
Below are a bunch of my raw running notes as I try to figure out how to run Kubernetes e2e tests locally.
I’m trying to add a new e2e test in the Kubernetes codebase (as part of the work required for the GA promotion of KEP-3085 (aka the feature-gate, PodReadyToStartContainerCondition).
And I want to be able to run this locally.
So, starting with the following steps to set up my environment:
clone the kubernetes repository
> git clone git@github.com:kubernetes/kubernetes.git
>cd kubernetes
> git checkout -b some-new-branch-name
# build all the binaries you'll need for running e2e locally> make WHAT=test/e2e/e2e.test
This will produce the e2e.test binary in ./output/bin/e2e.test path.
Set up a local kubernetes cluster (I’ll use kind)
> kind create cluster --name local-e2e-test
# to make sure my kubeconfig is pointing to the intended cluster> kubectl cluster-info
Run the e2e test binary (the newly built ./output/bin/e2e.test binary).
The e2e framework runs Ginkgo tests.
I can target the test I want to run, by its --ginkgo.focus flag.
I also learnt, that there’s a --help flag also available, if I want to understand the full length of the capablities offered by this e2e.test binary.
I tried a few of them below.
For example, If I want to get a dump of the entire list of e2e tests from the binary:
> ./_output/bin/e2e.test --list-tests
That prints all 7k+ test names.
So, if I want to check for a specific test, I can grep for some keyword or string used in the test definition (I learnt this needs to some keyword or string from the ginkgo.It(...) block where the test is invoked):
Also, please note, if I have added a new test after above steps, then IIUC e2e.test --list-tests won’t show it right away.
I’ll need to rebuild the binary to make the new test visible.
You know what? I realised what I did above, doesn’t really help me to run the Node e2e tests (aka the tests defined in the path test/e2d_node/* of the Kubernetes repository).
(And for the KEP-3085, that is exactly what I need - to be able to write and run Node e2e tests locally)
But before I move ahead - How did I realise that I need something else?
Well, because - e2e.test binary wasn’t able to list my intended test (which is defined in the test/e2e_node/pod_conditions_test.go path in the Kubernetes repo).
Ok, moving forward.
I figured out, there’s a different way to run these Node e2e tests locally.
I came across this handy document – Node End-To-End (e2e) tests.
This very thoroughly describes the process for running Node e2e tests locally (as well as, remotely, but that’s for some other day. I want to try the local execution first).
(Thank you, to the good folks in the SIG Node, this truly is a gem of a resource!)
Ok, let’s see if this helps me with my usecase!
There’s a bit of work needed (the pre-requisities) before I can start following the instructions in the document to actually run the tests.
I need to install etcd, and make sure it’s available in the path.
(I’m on an openSUSE Tumbleweed machine, so I did zypper install etcd and that did the job. Otherwise, follow the instructions from Etcd documentation here.)
> which etcd
/usr/sbin/etcd

> etcd --version
etcd Version: 3.6.4
Git SHA: Not provided (use ./build instead of go build)
Go Version: go1.24.5
Go OS/Arch: linux/amd64
Next, I need to install Containerd and configure cgroup driver to cgroupfs.
(once again, I did zypper install containerd. Otherwise, follow the instructions from Containerd documentation here.)
With these pre-requisties out of my way, for running the Node e2e tests (i.e., to run the ginkgo binary against the subdirectory test/e2e_node), I will use the following make target:
make test-e2e-node
And this also has a handy HELP option:
make test-e2e-node PRINT_HELP=y
Right now, I want to try running a single test, so, I will use the FOCUS arugment to target it.
(I want to test this block invoked via this ginkgo.It(...)description)
So, my make target call would look something like:
(Please note, I also had to set the KUBE_ROOT variable to point to the correct path to my local kubernetes repo clone.)
KUBE_ROOT=$(pwd) make test-e2e-node FOCUS="just the scheduled condition set"
Wait! It ran, but not successfully. I got the following error:
<<Captured StdOut/StdErr Output
Timeline >>
I0920 14:50:41.511206 22650 server.go:105] Starting server "services" with command "/home/psaggu/work-upstream/kep-3085-add-condition-for-sandbox-creation/kubernetes/_output/local/go/bin/e2e_node.test --run-services-mode --bearer-token=Ai-zpfsimz4_NvH2 --test.timeout=0 --ginkgo.seed=1758360041 --ginkgo.timeout=23h59m59.999947072s --ginkgo.grace-period=30s --ginkgo.focus=just the scheduled condition set --ginkgo.skip=\\[Flaky\\]|\\[Slow\\]|\\[Serial\\] --ginkgo.parallel.process=1 --ginkgo.parallel.total=8 --ginkgo.parallel.host=127.0.0.1:33109 --v 4 --report-dir=/tmp/_artifacts/250920T145006 --node-name alpha --kubelet-flags=--cluster-domain=cluster.local --dns-domain=cluster.local --prepull-images=false --container-runtime-endpoint=unix:///run/containerd/containerd.sock --runtime-config= --kubelet-config-file=test/e2e_node/jenkins/default-kubelet-config.yaml"
I0920 14:50:41.511254 22650 util.go:48] Running readiness check for service "services"
I0920 14:50:41.511354 22650 server.go:133] Output file for server "services": /tmp/_artifacts/250920T145006/services.log
I0920 14:50:41.511706 22650 server.go:163] Waiting for server "services" start command to complete
W0920 14:50:43.029782 22650 util.go:106] Health check on "https://127.0.0.1:6443/healthz" failed, status=500
I0920 14:50:44.032240 22650 services.go:69] Node services started.
I0920 14:50:44.032254 22650 kubelet.go:157] Starting kubelet
I0920 14:50:44.032259 22650 kubelet.go:159] Standalone mode: false
I0920 14:50:44.033031 22650 feature_gate.go:385] feature gates: {map[]}
I0920 14:50:44.042420 22650 server.go:105] Starting server "kubelet" with command "/usr/bin/systemd-run -p Delegate=true -p StandardError=append:/tmp/_artifacts/250920T145006/kubelet.log --unit=kubelet-20250920T145044.service --slice=runtime.slice --remain-after-exit /home/psaggu/work-upstream/kep-3085-add-condition-for-sandbox-creation/kubernetes/_output/local/go/bin/kubelet --kubeconfig /home/psaggu/work-upstream/kep-3085-add-condition-for-sandbox-creation/kubernetes/_output/local/go/bin/kubeconfig --root-dir /var/lib/kubelet --v 4 --config-dir /home/psaggu/work-upstream/kep-3085-add-condition-for-sandbox-creation/kubernetes/_output/local/go/bin/kubelet.conf.d --hostname-override alpha --container-runtime-endpoint unix:///run/containerd/containerd.sock --config /home/psaggu/work-upstream/kep-3085-add-condition-for-sandbox-creation/kubernetes/_output/local/go/bin/kubelet-config --cluster-domain=cluster.local"
I0920 14:50:44.042464 22650 util.go:48] Running readiness check for service "kubelet"
I0920 14:50:44.042571 22650 server.go:133] Output file for server "kubelet": /tmp/_artifacts/250920T145006/kubelet.log
I0920 14:50:44.043021 22650 server.go:163] Waiting for server "kubelet" start command to complete
W0920 14:50:45.058069 22650 util.go:104] Health check on "http://127.0.0.1:10248/healthz" failed, error=Head "http://127.0.0.1:10248/healthz": dial tcp 127.0.0.1:10248: connect: connection refused
...
...
In [SynchronizedBeforeSuite] at: k8s.io/kubernetes/test/e2e_node/e2e_node_suite_test.go:235 @ 09/20/25 14:52:44.204
------------------------------
[SynchronizedBeforeSuite] [FAILED] [122.848 seconds]
[SynchronizedBeforeSuite]
k8s.io/kubernetes/test/e2e_node/e2e_node_suite_test.go:235
[FAILED] SynchronizedBeforeSuite failed on Ginkgo parallel process #1
The first SynchronizedBeforeSuite function running on Ginkgo parallel process
#1 failed. This suite will now abort.
In [SynchronizedBeforeSuite] at: k8s.io/kubernetes/test/e2e_node/e2e_node_suite_test.go:235 @ 09/20/25 14:52:44.211
------------------------------
Summarizing 8 Failures:
[FAIL] [SynchronizedBeforeSuite]
k8s.io/kubernetes/test/e2e_node/e2e_node_suite_test.go:235
...
...
Ran 0 of 876 Specs in 130.799 seconds
FAIL! -- A BeforeSuite node failed so all tests were skipped.
Ginkgo ran 1 suite in 2m11.106353619s
Test Suite Failed
F0920 14:52:52.136374 21331 run_local.go:101] Test failed: exit status 1
exit status 1
make: *** [Makefile:292: test-e2e-node] Error 1
I did a little bit looking around and realised that my test is not able to start kubelet properly.
But I still couldn’t understand why exactly! Because the Kubelet binary is built as part of the test run and is available in the path - _output/local/go/bin/kubelet.
(I didn’t have to install kubelet binary by myself, it was built as part of the above make target run along with other components like kube-apiserver, etc.)
Some more digging (well, actually reading the above error message once again, properly).
I realised, I can find out the actually issue in the kubelet logs.
Below log helped:
I0920 14:50:44.042571 22650 server.go:133] Output file for server “kubelet”: /tmp/_artifacts/250920T145006/kubelet.log
So, checking the kubelet logs and it gave me the problem right away.
>tail-f /tmp/_artifacts/250920T145006/kubelet.log
I0920 14:50:44.151457 22917 server.go:579] "Sending events to api server"
I0920 14:50:44.151587 22917 swap_util.go:119] "Swap is on" /proc/swaps contents=<
Filename Type Size Used Priority
/dev/nvme0n1p3 partition 2097472 0 -2>
E0920 14:50:44.151610 22917 run.go:72] "command failed"err="failed to run Kubelet: running with swap on is not supported, please disable swap or set --fail-swap-on flag to false"
The swap is ON, on my machine.
The test setup expects me to to turn it OFF atleast for the duration of the execution of the test.
sudo swapoff -a
I turned off the swap and reran the test.
>KUBE_ROOT=$(pwd) make test-e2e-node FOCUS="just the scheduled condition set"<<Captured StdOut/StdErr Output
------------------------------
SSSSSSSSSSSSSSSSSSSSSSSSSSSSSSSSSSSSSSSSSSSSSSSSSSSSSS
Ran 1 of 876 Specs in 37.704 seconds
SUCCESS! -- 1 Passed | 0 Failed | 0 Pending | 875 Skipped
Ginkgo ran 1 suite in 37.997204389s
Test Suite Passed
It worked! The test ran successfully! Hurrah!
But where to check the logs now?
I can’t see any test execution logs, information like Pod status (pending -> initializing -> running, etc).
Figured out - the make test-e2e-node run captures a bunch of artifacts from the execution of the test.
I can find them in the /tmp/_artifacts path.
❯ ls /tmp/_artifacts/250920T153001

build-log.txt  containerd-installation.log  containerd.log  junit_01.xml  kern.log  kubelet.log  services.log
And in my case, for the Pod status related information, I can check those from the Kubelet logs.
❯ cat /tmp/_artifacts/250920T153001/kubelet.log
So, here we go. I have a solution for running my new node e2e tests locally.
After 145+ commits spread over multiplePRs, 450+ conversations and feedback, and accountable communication via several different communication mediums spanning over 2 years, the Ansible Release Management is finally completely automated, using GitHub Actions. When I joined Red Hat in November 2022, I was tasked with releasing the Ansible Community Package.
The first hurdle I faced was that there was no documented release process. What we had were release managers&apos private notes. It was over in personal repositories, internal Red Hat Google Docs, and personal code. Since all those past release managers left the organization (apart from one), it was very difficult to gather and figure out what, why, and how the release process worked. I had one supporter, my trainer (the then-release manager), Christian. He shared with me his notes and the steps he followed. He guided me on how he did the release.
Now we have a community release managers working group where contributors from the community also take part and release Ansible. And we have the two aforementioned GitHub actions.
First one builds the package and also opens a PR to the repository, and then waits for human input.
Meanwhile, the release manager can use the second action to create another PR to the Ansible documentation repository from the updated porting guide from the first PR.
After the PRs are approved, the release manager can continue with the first action and release the Ansible wheel package and the source tarball to PyPI in a fully automated way using trusted publishing.
I would like to thank Felix, Gotmax and Sviatoslav for feedback during the journey, thank you.
Many say automation is bad. In many companies, management gets the wrong idea that, when good automation is in place, they can fire senior engineers and get interns or inexperienced people to get the job done. That works till something breaks down. The value of experience comes when we have to fix things in automation. Automation enables new folks to get introduced to things, and enables experienced folks to work on other things.
Yeah, everyone already knows the syntax is different. No need to waste time on that.
Let’s look at what actually matters — how they behave differently.
1. arguments
Regular functions come with this built-in thing called arguments object. Even if you don’t define any parameters, you can still access whatever got passed when the function was called.
Arrow functions? Nope. No arguments object. Try using it, and it’ll just throw an error.
Arrow functions have implicit return but regular functions don't.
i.e We can return the result automatically if we write it in a single line , inside a parenthesis in arrow functions. Regular functions always require the return keyword.
Regular function:
function add(a, b) {
 const c = a + b;
}

console.log(add(5, 10)); // o/p : undefined
Arrow function:
const add = (a, b) => (a + b);

console.log(add(5, 10)); // o/p : 15
3. this
Arrow functions do not have their own this binding. Instead, they lexically inherit this from the surrounding (parent) scope at the time of definition. This means the value of this inside an arrow function is fixed and cannot be changed using .call(), .apply(), or .bind().
Regular functions, on the other hand, have dynamic this binding — it depends on how the function is invoked. When called as a method, this refers to the object; when called standalone, this can be undefined (in strict mode) or refer to the global object (in non-strict mode).
Because of this behavior, arrow functions are commonly used in cases where you want to preserve the outer this context, such as in callbacks or within class methods that rely on this from the class instance.
So I was fixing some slow tests, and whenever I ran them through the pytest command, I was greeted with the dreaded max_locks_per_transaction error.
My first instinct? Just crank up the max_locks_per_transaction from 64 to 1024.
But... that didn’t feel right. I recreate my DB frequently, which means I’d have to set that value again and again. It felt like a hacky workaround rather than a proper solution.
Then, like any developer, I started digging around — first checking the Confluence page for dev docs to see if anyone else had faced this issue. No luck. Then I moved to Slack, and that’s where I found this command someone had shared:
pytest -n=0
This was new to me. So, like any sane dev in 2025, I asked ChatGPT what this was about. That’s how I came across pytest-xdist.
What is pytest-xdist?
The pytest-xdist plugin extends pytest with new test execution modes — the most common one is distributing tests across multiple CPUs to speed up test execution.
What does pytest-xdist do?
Runs tests in parallel using <numprocesses> workers (Python processes), which is a game changer when:
– You have a large test suite
– Each test takes a significant amount of time
– Your tests are independent (i.e., no shared global state)
That’s pretty much it — I plugged in pytest -n=0 and boom, no more transaction locks errors.
---
name: Testing Gha
on:
  workflow_dispatch:
    inputs:
      GIT_BRANCH:
        description: The git branch to be worked on
        required: true

jobs:
  test-pr-creation:
    name: Creates test PR
    runs-on: ubuntu-latest
    permissions:
      pull-requests: write
      contents: write
    env:
      GIT_BRANCH: ${{ inputs.GIT_BRANCH }}
    steps:
      - uses: actions/checkout@v4
      - name: Updates README
        run: echo date >> README.md

      - name: Set up git
        run: |
          git switch --create "${GIT_BRANCH}"
          ACTOR_NAME="$(curl -s https://api.github.com/users/"${GITHUB_ACTOR}" | jq --raw-output &apos.name // .login&apos)"
          git config --global user.name "${ACTOR_NAME}"
          git config --global user.email "${GITHUB_ACTOR_ID}+${GITHUB_ACTOR}@users.noreply.github.com"

      - name: Add README
        run: git add README.md

      - name: Commit
        run: >-
          git diff-index --quiet HEAD ||
          git commit -m "test commit msg"
      - name: Push to the repo
        run: git push origin "${GIT_BRANCH}"

      - name: Create PR as draft
        env:
          GITHUB_TOKEN: ${{ github.token }}
        run: >-
          gh pr create
          --draft
          --base main
          --head "${GIT_BRANCH}"
          --title "test commit msg"
          --body "pr body"

      - name: Retrieve the existing PR URL
        id: existing-pr
        env:
          GITHUB_TOKEN: ${{ github.token }}
        run: >
          echo -n pull_request_url= >> "${GITHUB_OUTPUT}"

          gh pr view
          --json &aposurl&apos
          --jq &apos.url&apos
          --repo &apos${{ github.repository }}&apos
          &apos${{ env.GIT_BRANCH }}&apos
          >> "${GITHUB_OUTPUT}"
      - name: Select the actual PR URL
        id: pr
        env:
          GITHUB_TOKEN: ${{ github.token }}
        run: >
          echo -n pull_request_url=
          >> "${GITHUB_OUTPUT}"

          echo &apos${{steps.existing-pr.outputs.pull_request_url}}&apos
          >> "${GITHUB_OUTPUT}"

      - name: Log the pull request details
        run: >-
           echo &aposPR URL: ${{ steps.pr.outputs.pull_request_url }}&apos | tee -a "${GITHUB_STEP_SUMMARY}"


      - name: Instruct the maintainers to trigger CI by undrafting the PR
        env:
          GITHUB_TOKEN: ${{ github.token }}
        run: >-
            gh pr comment
            --body &aposPlease mark the PR as ready for review to trigger PR checks.&apos
            --repo &apos${{ github.repository }}&apos
            &apos${{ steps.pr.outputs.pull_request_url }}&apos
The above is an example of how to create a draft PR via GitHub Actions. We need to give permissions to the GitHub action to create PR in a repository (workflow permissions in the settings).
Hopefully, this blogpost will help my future self.
I’ve been working on a few side projects and using ChatGPT for ideation and brainstorming around ideas and features for the MVP. As part of this, I needed a logo for my app. Naturally, I turned to AI to help me generate one.
However, I noticed that when generating images, ChatGPT doesn’t always follow the guidelines perfectly. Each time I asked for a new version, it would create a completely different image, which made it difficult to iterate or make small tweaks.
But I found a better way.
Instead of generating a brand new image every time, I first explained my app idea and the name. ChatGPT generated an image I liked.
So I asked ChatGPT to generate the JSON for the image instead. I then manually tweaked the JSON file to adjust things exactly the way I wanted. When I asked ChatGPT to generate the image based on the updated JSON, it finally created the image as per my request — no random changes, just the specific adjustments I needed.
Exploration Phase
{
  "image": {
    "file_name": "splitX_icon_with_text.png",
    "background_color": "black",
    "elements": [
      {
        "type": "text",
        "content": "SplitX",
        "font_style": "bold",
        "font_color": "white",
        "position": "center",
        "font_size": "large"
      },
      {
        "type": "shape",
        "shape_type": "X",
        "style": "geometric split",
        "colors": [
          {
            "section": "top-left",
            "gradient": ["#FF4E50", "#F9D423"]
          },
          {
            "section": "bottom-left",
            "gradient": ["#F9D423", "#FC913A"]
          },
          {
            "section": "top-right",
            "gradient": ["#24C6DC", "#514A9D"]
          },
          {
            "section": "bottom-right",
            "gradient": ["#514A9D", "#E55D87"]
          }
        ],
        "position": "center behind text",
        "style_notes": "Each quadrant of the X has a distinct gradient, giving a modern and vibrant look. The X is split visually in the middle, aligning with the 'Split' theme."
      }
    ]
  }
}
Final Design
Updated JSON
{
  "image": {
    "file_name": "splitX_icon_with_text.png",
    "background_color": "transparent",
    "elements": [
      {
        "type": "shape",
        "shape_type": "X",
        "style": "geometric split",
        "colors": [
          {
            "section": "top-left",
            "gradient": [
              "#FF4E50",
              "#F9D423"
            ]
          },
          {
            "section": "bottom-left",
            "gradient": [
              "#F9D423",
              "#FC913A"
            ]
          },
          {
            "section": "top-right",
            "gradient": [
              "#24C6DC",
              "#514A9D"
            ]
          },
          {
            "section": "bottom-right",
            "gradient": [
              "#514A9D",
              "#E55D87"
            ]
          }
        ],
        "position": "center ",
        "style_notes": "Each quadrant of the X has a distinct gradient, giving a modern and vibrant look. The X is split visually in the middle, aligning with the 'Split' theme."
      }
    ]
  }
}
If you want to tweak or refine an image, first generate the JSON, make your changes there, and then ask ChatGPT to generate the image using your updated JSON. This gives you much more control over the final result.
Cheers!
P.S. Feel free to check out the app — it's live now at https://splitx.org/. Would love to hear what you think!
Hello people of the world wide web.
I'm Titas, a CS freshman trying to learn programming and build some cool stuff. Here's how I understood the importance of open source.
The first time I heard of open source was about 3 years ago in a YouTube video, but I didn't think much of it.
Read about it more and more on Reddit and in articles.
Fast forward to after high school — I'd failed JEE and had no chance of getting into a top engineering college. So I started looking at other options, found a degree and said to myself: Okay, I can go here. I already know some Java and writing code is kinda fun (I only knew basics and had built a small game copying every keystroke of a YouTube tutorial).
So I thought I could learn programming, get a job, and make enough to pay my bills and have fun building stuff.
Then I tried to find out what I should learn and do.
Being a fool, I didn't look at articles or blog posts — I went to Indian YouTube channels.
And there was the usual advice: Do DSA & Algorithms, learn Web Development, and get into FAANG.
I personally never had the burning desire to work for lizard man, but the big thumbnails with “200k”, “300k”, “50 LPA” pulled me in.
I must’ve watched 100+ videos like that.
Found good creators too like Theo, Primeagen, etc.
So I decided I'm going to learn DSA.
First, I needed to polish my Java skills again.
Pulled out my old notebook and some YT tutorials, revised stuff, and started learning DSA.
It was very hard.
Leetcode problems weren't easy — I was sitting for hours just to solve a single problem.
3 months passed by — I learnt arrays, strings, linked lists, searching, sorting till now.
But solving Leetcode problems wasn't entertaining or fun.
I used to think — why should I solve these abstract problems if I want to work in FAANG (which I don't even know if I want)?
Then I thought — let's learn some development.
Procrastinated on learning DSA, and picked up web dev — because the internet said so.
Learnt HTML and CSS in about 2-3 weeks through tutorials, FreeCodeCamp, and some practice.
Started learning JavaScript — it's great.
Could see my output in the browser instantly.
Much easier than C ,which is in my college curriculum (though I had fun writing C).
Started exploring more about open source on YouTube and Reddit.
Watched long podcasts to understand what it's all about.
Learnt about OSS — what it is, about Stallman, GNU, FOSS.
OSS felt like an amazing idea — people building software and letting others use it for free because they feel like it.
The community aspect of it.
Understood why it's stupid to have everything under control of a capitalist company — who can just one day decide to stop letting you use your own software that you paid for.
Now I’m 7 months into college, already done with sem 1, scored decent marks.
I enjoy writing code but haven't done anything substantial.
So I thought to ask for some help. But who to ask?
I remembered a I've heard about this distant cousin Kushal who lives in Europe and has done some great software and my mother mentioned him like he was some kind of a genius .I once had a brief conversation with him via text regarding if I should take admission in BCA than an engineering degree, and his advice gave me some motivation and positivity .
He said:
“BCA or Btech will for sure gets a job faster
Than tradional studying
If you can put in hours, that is way more important than IQ.
I have very average IQ but I just contributed to many projects.”
So 7 months later, I decided to text him again — and surprisingly, he replied and agreed to talk with me on a call.
Spoke with him for 45 odd minutes and asked a bunch of questions about software engineering, his work, OSS, etc.
Had much better clarity after talking with him.
He gave me the dgplug summer training docs and a Linux book he wrote.
So I started reading the training docs.
Step 0: Install a Linux distro → already have it ✅
Step 1: Learn touch typing → already know it ✅
Kept reading the training docs.
Read a few blog posts on the history of open source — already knew most of the stuff but learnt some key details.
Read a post by Anwesha on her experience with hacking culture and OSS as a lawyer turned software engineer — found it very intriguing.
Then watched the documentaries Internet's Own Boy and Coded Bias.
Learnt much more about Aaron Swartz than I knew — I only knew he co-founded Reddit and unalived himself after getting caught trying to open-source the MIT archives.
Now I had a deeper understanding of OSS and the culture.
But I had a big question about RMS — why was he so fixated on the freedom to hack and change stuff in the software he owned?
(Yes, the Free in FOSS doesn’t stand for free of cost — it stands for freedom.)
I thought free of cost makes sense — but why should someone have the right to make changes in a paid software?
Couldn't figure it out.
Focused on JS again — also, end-semester exams were coming.
My university has 3 sets of internal exams before the end-semester written exams. Got busy with that.
Kept writing some JS in my spare time.
Then during my exams...
It was 3:37 am, 5 June. I had my Statistics exam that morning.
I was done with studying, so I was procrastinating — watching random YouTube videos.
Then this video caught my attention: How John Deere Steals Farmers of $4 Billion a Year
It went deep into how John Deere installs software into their tractors to stop farmers and mechanics from repairing their own machines.
Only authorized John Deere personnel with special software could do repairs.
Farmers were forced to pay extra, wait longer, and weren’t allowed to fix their own property.
Turns out, you don’t actually buy the tractor — you buy a subscription to use it.
Even BMW, GM, etc. make it nearly impossible to repair their cars.
You need proprietary software just to do an oil change.
Car makers won’t sell the software to these business owners, BUT they'll offer 7500$/year subscriptions to use their software.
One auto shop owner explained how he has to pay $50,000/year in subscriptions just to keep his business running.
These monopolies are killing small businesses.
It’s not just India — billion-dollar companies everywhere are hell-bent on controlling everything.
They want us peasants to rent every basic necessity — to control us.
And that night, at 4:15 AM, I understood:
OSS is not just about convenience. It’s not just for watching movies with better audio or downloading free pictures for my college projects.
It’s a political movement — against control.
It’s about the right to exist, and the freedom to speak, share, and repair.
That's about it. I'm not a great writer — it's my first blog post.
Next steps?
Learn to navigate IRC.
Get better at writing backends in Node.js.
And I'll keep writing my opinions, experiences, and learnings — with progressively better English.
At a high level, the script runs the following commands from the root of the repo:
go work init
go work edit -go 1.24.0 -godebugdefault=go1.24
go work edit -use.
git ls-files -z':(glob)./staging/src/k8s.io/*/go.mod'\
| xargs -0-n1dirname-z\
| xargs -0-n1 go work edit -use
go mod download
go work vendor
This creates:
go.work file that includes the root module (.) and all the Kubernetes staging modules under staging/src/k8s.io.
While updating the Edusign validator to a newer
version, I had to build the image with JDK 21 (which is there in Debian Sid).
And while the application starts, it fails to read the TLS keystore file with a
specific error:
... 13 common frames omitted
Caused by: java.lang.IllegalStateException: Could not load store from '/tmp/demo.edusign.sunet.se.p12'
at org.springframework.boot.ssl.jks.JksSslStoreBundle.loadKeyStore(JksSslStoreBundle.java:140) ~[spring-boot-3.4.4.jar!/:3.4.4]
at org.springframework.boot.ssl.jks.JksSslStoreBundle.createKeyStore(JksSslStoreBundle.java:107) ~[spring-boot-3.4.4.jar!/:3.4.4]
... 25 common frames omitted
Caused by: java.io.IOException: keystore password was incorrect
at java.base/sun.security.pkcs12.PKCS12KeyStore.engineLoad(PKCS12KeyStore.java:2097) ~[na:na]
at java.base/sun.security.util.KeyStoreDelegator.engineLoad(KeyStoreDelegator.java:228) ~[na:na]
at java.base/java.security.KeyStore.load(KeyStore.java:1500) ~[na:na]
at org.springframework.boot.ssl.jks.JksSslStoreBundle.loadKeyStore(JksSslStoreBundle.java:136) ~[spring-boot-3.4.4.jar!/:3.4.4]
... 26 common frames omitted
Caused by: java.security.UnrecoverableKeyException: failed to decrypt safe contents entry: javax.crypto.BadPaddingException: Given final block not properly padded. Such issues can arise if a bad key is used during decryption.
... 30 common frames omitted
I understood that somehow it is not being able to read file due to bad passphrase. But, the same file with same passphrase can be opened by the older
version of the application (in the older containers).
After spending too many hours reading, I finally found the trouble. The
openssl was using too new algorithm. By default it will use AES_256_CBC for
encryption and PBKDF2 for key derivation. But, if we pass -legacy to the
openssl pkcs12 -export command, then it using RC2_CBC or 3DES_CBC for
certificate encryption depening if RC2 cipher is enabled.
This finally solved the issue and the container started cleanly.
Each year, I try to experience a new PyCon. 2025, PyCon Lithuania was added to my PyCon calendar.
Day before the conference
What makes this PyCon, is that we were traveling there as a family and the conference days coincided with the Easter holidays. We utilized that to explore the city—the ancient cathedrals, palaces, old cafes, and of course the Lithuanian cuisine. Šaltibarščiai, Balandeliai and Cepelinai.
Tuesday
22nd, the day before the conference was all about practicing the talk and meeting with the community. We had the pre-conference mingling session with the speakers and volunteers. It was time to meet some old and many new people. Then it was time for PyLadies. Inga from PyLadies Lithuania, Nina from Pyladies London and I had a lovely dinner discussion—good food with the PyLadies community,technology, and us.
Wednesday
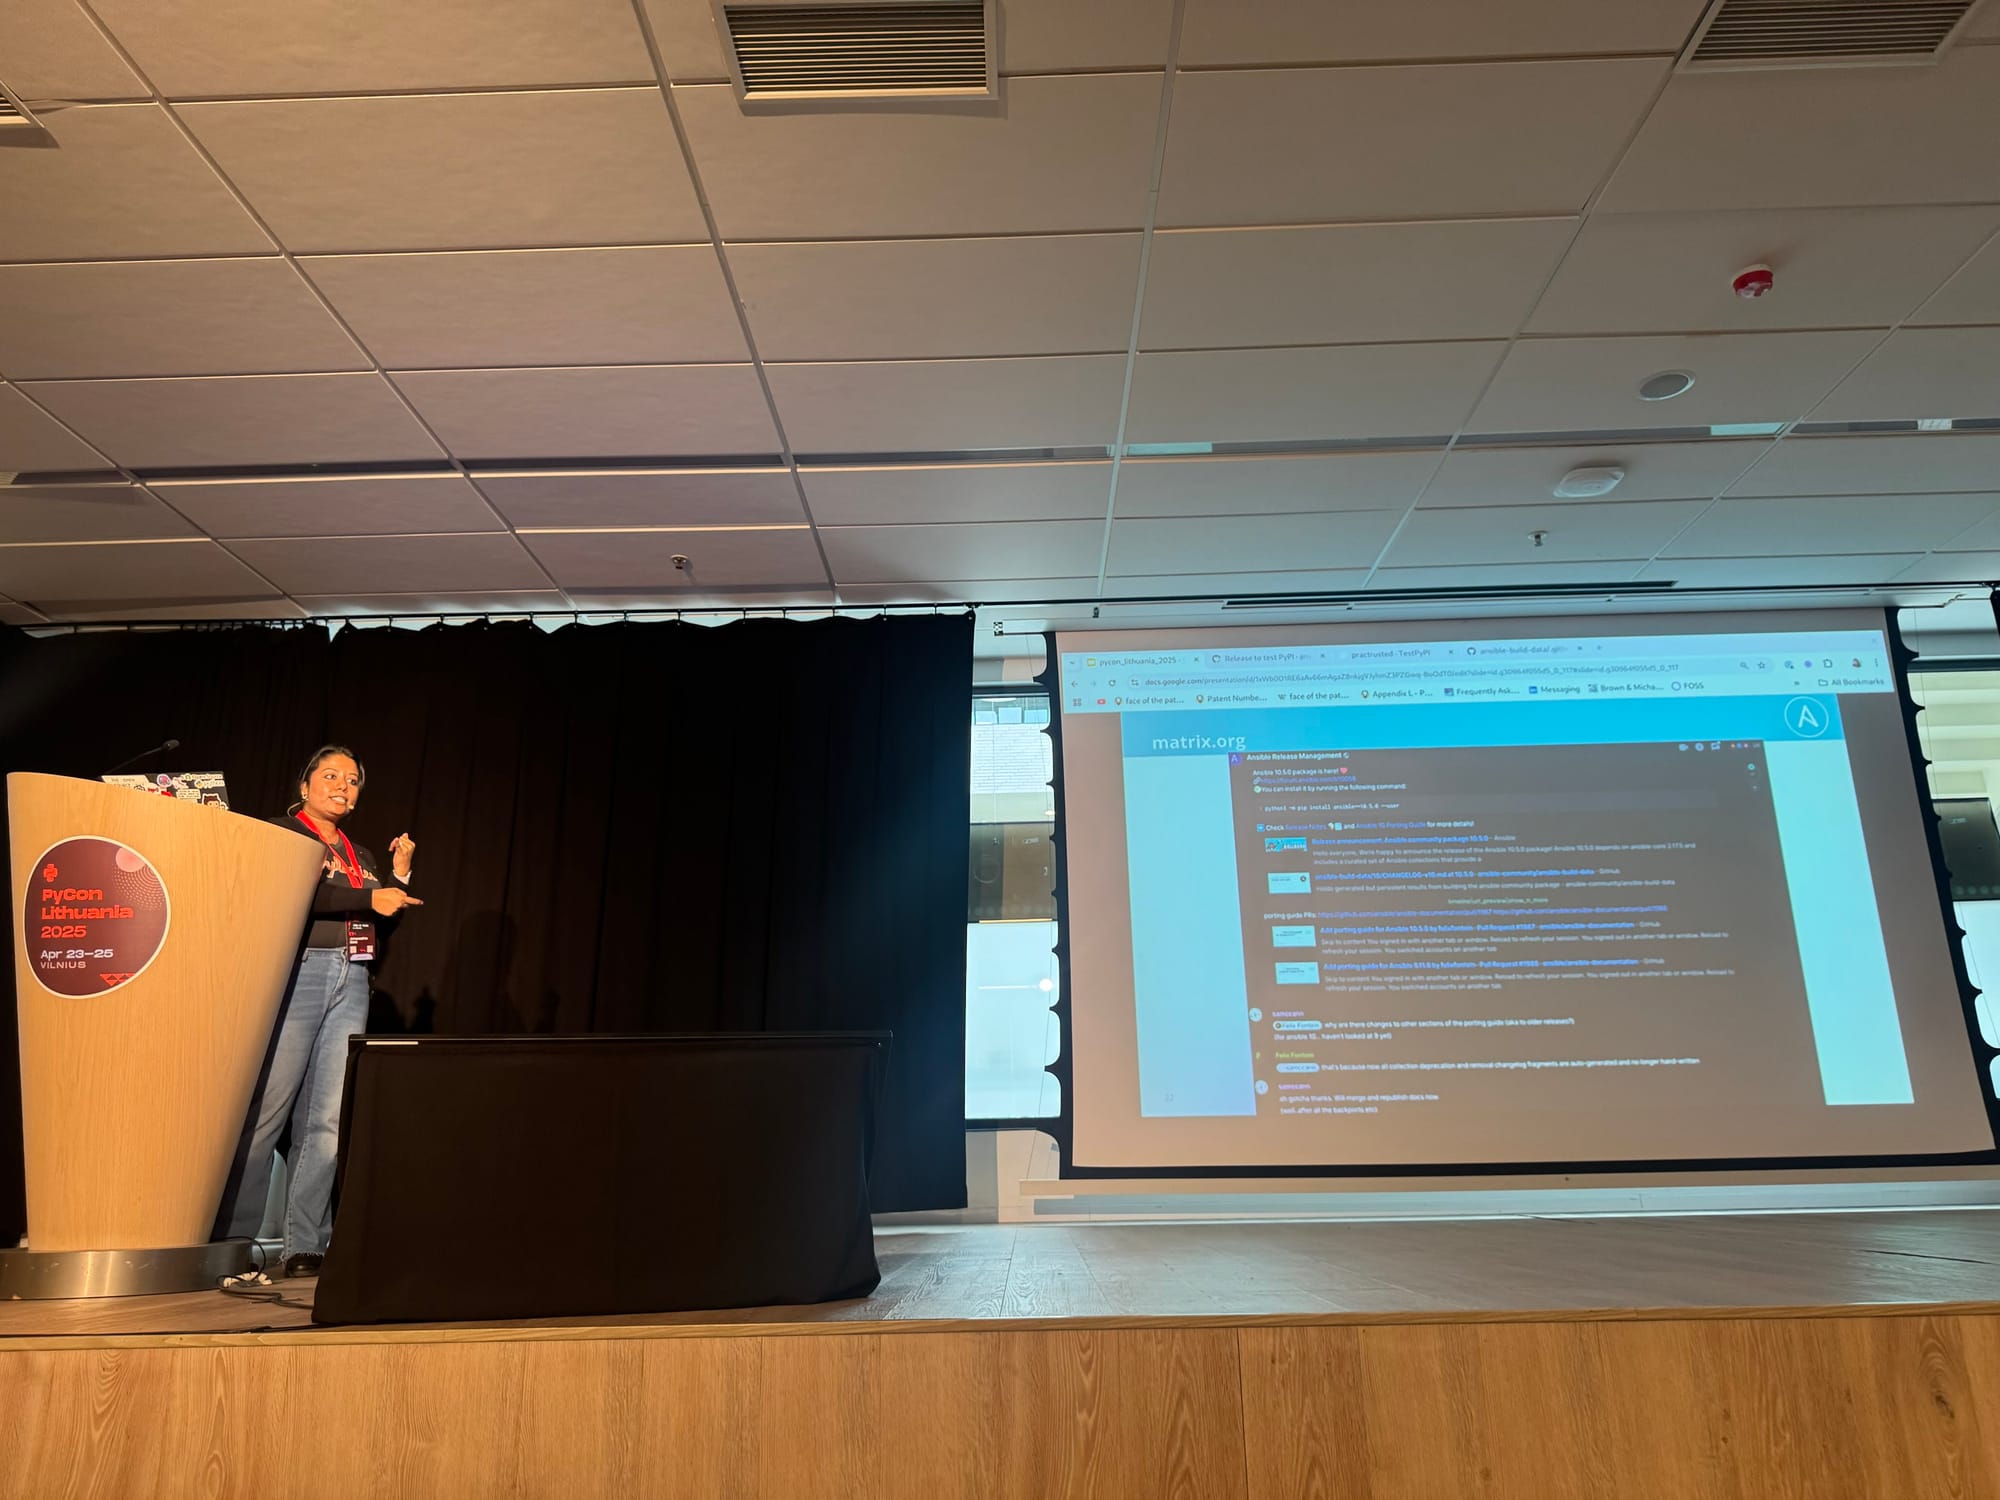
The morning started early for us on the day of the conference. All the 3 of us had different responsibilities during the conference. While Py was volunteering, I talked and Kushal was the morning keynoter A Python family in a true sense :)
I had my talk, “Using PyPI Trusted Publishing to Ansible Release” scheduled for the afternoon session. The talk was about automating the Ansible Community package release process with GitHub action using the trusted publisher in PyPI. The talk described - what is trusted publishing.I explanined the need for it and the usage of trusted publishing. I explained the Ansible manual release process in a nutshell and then moved to what the Ansible release process is now with GitHub actions and Trusted Publishing. Then the most important part is, the lessons learned in the process and how other open-source communities can get help and benefit from it.Here is the link for the slides of my talk I had questions regarding trusted publishing, experience as a release manager, and of course Ansible.
It was the time to bid goodbye to PyCon Lt and come back home. See you next year. Congratulatios organizers for doing a great job in organizing the coference.
The go_modules OBS service is used to download, verify, and vendor Go module dependency sources.
As described in the source project’s (obs-service-go_modules) README:
Using the go.mod and go.sum files present in a Go application, obs-service-go_modules will call Go tools in sequence:
go mod download
go mod verify
go mod vendor
obs-service-go_modules then creates a vendor.tar.gz archive (or another supported compression format) containing the vendor/ directory generated by go mod vendor.
This archive is produced in the RPM package directory and can be committed to OBS to support offline Go application builds for openSUSE, SUSE, and various other distributions.
The README also provides a few usage examples for packagers.
However, it wasn’t immediately clear how to use the go_modules OBS service to create multiple vendor tarballs from different subdirectories within a single Git source repository.
Below is an example where I create multiple vendor tarballs from a single Git repo— (in this case, the etcd project):
<services><!-- Service #1 --><servicename="obs_scm"><paramname="url">https://github.com/etcd/etcd.git</param><paramname="scm">git</param><paramname="package-meta">yes</param><paramname="versionformat">@PARENT_TAG@</param><paramname="versionrewrite-pattern">v(.*)</param><paramname="revision">v3.5.21</param><paramname="without-version">yes</param></service><!-- Service #2 --><servicename="go_modules"><paramname="archive">*etcd.obscpio</param></service><!-- Service #3 --><servicename="go_modules"><paramname="archive">*etcd.obscpio</param><paramname="subdir">server</param><paramname="vendorname">vendor-server</param></service><!-- Service #4 --><servicename="go_modules"><paramname="archive">*etcd.obscpio</param><paramname="subdir">etcdctl</param><paramname="vendorname">vendor-etcdctl</param></service></services>
The above _service file defines four services:
Service 1 clones the GitHub repo github.com/etcd/etcd.git into the build root. The resulting output is a cpio archive blob—etcd.cpio.
Service 2 locates the etcd.cpio archive, extracts it, runs go mod download, go mod verify, and go mod vendor from the repo root, and creates the default vendor.tar.gz.
Service 3 and Service 4 work the same as Service 2, with one difference: they run the Go module commands from subdirectories:
Service 3 changes into the server/ directory before running the Go commands, producing a tarball named vendor-server.tar.gz.
Service 4 does the same for the etcdctl/ directory, producing vendor-etcdctl.tar.gz.
🔍 Note the subdir and vendorname parameters. These are the key to generating multiple vendor tarballs from various subdirectories, with custom names.
I found the full list of parameters accepted by the go_modules service defined here1:
Also, while writing this post, I discovered that the final vendor tarball can be compressed in one of the following supported formats3:
.tar.bz2
.tar.gz
.tar.lz
.tar.xz
.tar.zst
And finally, here’s the list of supported source archive formats (the blob from which the vendor tarball is created), powered by the libarchive Python module4:
This blog initially started as part of the summer training by DGPLUG, where the good folks emphasize the importance of blogging and encourage everyone to write—about anything! That motivation got me into the habit, and I’ve been blogging on and off ever since.
2. What platform are you using to manage your blog and why did you choose it?
I primarily write on WriteFreely, hosted by Kushal, who was kind enough to host an instance. I also occasionally write on my WordPress blog. So yeah, I have two blogs.
3. Have you blogged on other platforms before?
I started with WordPress because it was a simple and fast way to get started. Even now, I sometimes post there, but most of my recent posts have moved to the WriteFreely instance.
4. How do you write your posts?
I usually just sit down and write everything in one go. Followed by editing part—skimming through it once, making quick changes, and then hitting publish.
5. When do you feel most inspired to write?
Honestly, I don’t wait for inspiration. I write whenever I feel like it—sometimes in a diary, sometimes on my laptop. A few of those thoughts end up as blog posts, while the rest get lost in random notes and files.
6. Do you publish immediately after writing or do you let it simmer a bit as a draft?
It depends. After reading a few books and articles on writing, I started following a simple process: finish a draft in one sitting, come back to it later for editing, and then publish.
7. Your favorite post on your blog?
Ahh! This blog post on Google Cloud IAM is one I really like because people told me it was well-written! :)
8. Any future plans for your blog? Maybe a redesign, changing the tag system, etc.?
Nope! I like it as it is. Keeping it simple for now.
A big thanks to Jason for mentioning me in the challenge!
I have never been the social media type of person. But that doesn’t
mean I don’t want to socialize and get/stay in contact with other
people. So although not being a power-user, I always enjoyed building
and using my online social network. I used to be online on ICQ basically
all my computer time and I once had a rich Skype contact list.
However, ICQ just died because people went away to use other
services. I remember how excited I was when WhatsApp became available.
To me it was the perfect messenger; no easier way to get in contact and
chat with your friends and family (or just people you somehow had in
your address book), for free. All of those services I’ve ever been using
followed one of two possible scenarios:
Either they died because people left for the bigger platform
or the bigger platform was bought and/or changed their terms of use
to make any further use completely unjustifiable (at least for me)
Quitstory
2011 I quit StudiVZ, a social network that I joined in 2006, when it
was still exclusive for students. However, almost my whole bubble left
for Facebook so to stay in contact I followed. RIP StudiVZ, we had a
great time.
Also 2011 I quit Skype, when it was acquired by Microsoft. I was not
too smart back then, but I already knew I wanted to avoid Microsoft. It
wasn’t hard anyway, most friends had left already.
2017 I quit Facebook. That did cost me about half of my connections
to old school friends (or acquaintances) and remote relatives. But the
terms of use (giving up all rights on any content to Facebook) and their
practices (crawling all my connections to use their personal information
against them) made it impossible for me to stay.
2018 I quit WhatsApp. It was a hard decision because, as mentioned
before, I was once so happy about this app’s existence, and I was using
it as main communication channel with almost all friends and family. But
2014 WhatsApp was bought by Facebook. In 2016 it was revealed that
Facebook was combining the data from messenger and Facebook platform for
targeted advertising and announced changes on terms of use. For me it
was not possible to continue using the app.
Also 2018 I quit Twitter. Much too late. It has been the platform
that allowed the rise of an old orange fascist, gave him the stage he
needed and did by far not enough against false information spreading
like crazy. I didn’t need to wait for any whistle blowers to know that
the recommendation algorithm was favoring hate speech and
miss-information, to know that this platform was not good for my mental
health, anyway. I’m glad though, I was gone before the takeover.
Also 2018 I quit my Google account. I was using it to run my Android
phone, mainly. However, quitting Google never hurt me - syncing my
contacts and calendars via cardDAV and calDAV has always been painless.
Google circles (which I peeked into for a week or so) never became a
think anyway. I started using custom roms (mainly Cyanogen, later
lineage OS) for all my phones anyway.
2020 I quit Amazon. Shopping is actually more fun again. I still do
online shopping occasionally, most often trying to buy from the
manufacturers directly, but if I can I try to do offline shopping in our
beautiful city.
2021 I quit smartphone. I just stopped using my phone for almost
anything except making and receiving calls. I have tried a whole bunch
of things to gain control over the device but found that it was
impossible for me. I found that the device had in fact more control over
me than vice versa; I had to quit.
2024 I quit Paypal. It’s a shame that our banks cannot come up with
a convenient solution, and it’s also a shame I helped to make that
disgusting person who happens to own Paypal even richer.
Also in 2024 I quit Github. It’s the biggest code repository in the
world. I’m sure it’s the biggest hoster of FOSS projects, too. Why? Why
sell that to a company like Microsoft? I don’t want to have a Microsoft
account. I had to quit.
Call them as you may; big four, big five, GAFAM/FAAMG etc. I quit
them all. They have a huge impact on our live, and I think it’s not for
the better. They all have shown often enough, that they cannot be
trusted; they gather and link all information about us they can lay
hands on and use them against us, selling us out for the highest bidding
(and the second and third highest, because copying digital data is
cheap). I’m not regretting my decisions, but they were not without
implications. And in fact I am quite pissed because I don’t think it is
my fault that I had to quit. It is something that those big
tech companies took from me.
I lost contact to a bunch of people. Maybe this is a FOMO kind of
thing; it’s not that I was in contact with these distant relatives or
acquaintances, but I had a low threshold of reaching out. Not so much,
anymore.
People are reacting angrily if they find they cannot reach me. I am
available via certain channels, but a lot of people don’t
understand my reasoning to not join the big networks. As if I was trying
to make their lives more complicated as necessary.
I can’t do OAuth. If online platforms don’t implement their own
login and authentication but instead rely on identification via the big
IdPs, I’m out. Means I will probably not be able to participate in
Advent of Code this year. It’s kind of sad.
I’m the last to know. Not being in that WhatsApp group, and not
reading the Signal message about the meeting cancellation 5 minutes
before scheduled start (because I don’t have Signal on my phone), does
have that effect. There has been a certain engagement once, when you
agreed to something or scheduled a meeting etc. But these days,
everything can be changed and cancelled just minutes before some
appointment with a single text message. I feel old(fashioned) when
trusting in others’ engagement, but I don’t want to give it up,
yet.
Of course there is still potential to quit even more: I don’t have a
Youtube account (of course) but I still watch videos there. I do have a
Netflix subscription, and cancelling that would put me into serious
trouble with my family. I’m also occasionally looking up locations on
Google maps, but only if I want to look at the satellite pictures.
However, the web is becoming more and more bloated with ads and
trackers, old pages that were fun to browse in the earlier days of the
web have vanished; it’s not so much fun to use anymore. Maybe the HTTP/S
will be the next thing for me to quit.
Conclusions
I’m still using the internet to read my news, to connect with friends
and family and to sync and backup all the stuff that’s important to me.
There are plenty of alternatives to big tech that I have found work
really well for me. The recipe is almost always the same: If it’s open
and distributed, it’s less likely to fall into the hands of tech
oligarchs.
I’m using IRC, Matrix and Signal for messaging, daily. Of those,
Signal may have the highest risk of disappointing me one day, but I do
have faith. Hosting my own Nextcloud and Email servers has to date been
a smooth and nice experience. Receiving my news via RSS and atom feeds
gives me control over the sources I want to expose myself to, without
being flooded with ads.
I have tried Mastodon and other Fediverse networks, but I was not
able to move any of my friends there to make it actual fun. As
mentioned, I’ve never been too much into social media, but I like(d) to
see some vital signs of different people in my life from time to time. I
will not do bluesky, as I cannot see how it differs from those big
centralized platforms that have failed me.
It’s not a bad online-life and after some configuration it’s no
harder to maintain than any social media account, too. I only wish it
wouldn’t have been necessary for me to walk this path. The web could
have developed much differently, and be an open and welcoming space for
everyone today. Maybe we’ll get there someday.
As mentioned in the previous post, I have been using several
frameworks for blogging. But the threshold to overcome to begin and
write new articles were always too hight to just get started.
Additionally, I’m getting more and more annoyed by the internet, or
specifically browsing the www via HTTP/S. It’s beginning to feel like
hard work to not get tracked everywhere and to not support big tech and
their fascist CEOs by using their services. That’s why I found the
gemini protocol interesting ever since I got to know about it. I wrote
about it before:
That’s why I decided to not go for HTTPS-first in my blog, but do
gemini first. Although you’re probably reading this as the generated
HTML or in your feed reader.
Low-threshold writing
To just get started, I’m now using my tmux session that is running
24/7 on my home server. It’s the session I open by default on all my
devices, because it contains my messaging (IRC, Signal, Matrix) and news
(RSS feeds). Not it also contains a neovim session that let’s me just
push all my thoughts into text files easily and everywhere.
The format I write in is gemtext, a markup language that is even
simpler as Markdown. Gemtext allows three different headings, links,
lists, blockquotes and formatted text, and that’s it. And to make my
life even easier, I only need to touch a file
.directory-listing-ok to let agate create an autoindex of
each directory, so I don’t have to take care about house-keeping and
linking my articles too much. I just went with this scheme to make sure
my posts appear in a correct order:
When pointed to a directory, agate will automatically serve the
index.gmi if it finds one.
To serve the files in my gemlog, I just copy them as is, using
rsync. If anyone would browse the gemini space I would be
done at this point. I’m using agate, a gemini server
written in Rust, to serve the static blog. Technically, gemini would
allow more than that, using cgi to process requests and dynamically
return responses, but simple is just fine.
The not-so-low publishing
threshold
However, if I ever want any person to actually read this, sadly I
will have to offer more than gemtext. Translating everything into HTML
and compiling an atom.xml comes with some more challenges. Now I will
need some metadata like title and date. For
now I’m just going to add that as formatted text at the beginning of
each file I want to publish. The advantage is, that I can filter out
files I want to keep private this way. Using ripgrep I just find all
files with the published directive and pipe them through my
publishing script.
To generate the HTML, I’m going the route
gemtext -> markdown -> html, in lack of better ideas.
Gemtext to Markdown is trivial, I only need to format the links (using
sed in my case). To generate the HTML I use pandoc,
although it’s way too powerful and not-lightweight for this task. But I
just like pandoc. I’m adding simple.css to I don’t have to fuddle around
with any design questions.
I was looking for an atom feed generator, until I noticed how easily
this file can be generated manually. Again, a little bit of ripgrep and
bash leaves me with an atom.xml that I’m actually quite happy with.
The yak can be
shaved until the end of the world
I hope I have put everything out of the way get started easily and
quickly. I could configure the system until the end of time to make
unimportant things look better, but I don’t want to fall into that trap
(again). I’m going to publish my scripts to a public repository soon, in
case anyone feels inspired to go a similar route.
That’s been the first question I asked myself when starting this
blog. It was part of the DGPLUG #summertraining and I kind of started
without actually knowing what to do with it. But I did want to have my
own little corner in cyberspace.
2.
What platform are you using to manage your blog and why did you choose
it?
I have a home server running vim in a tmux session. The articles are
written as gemtext as I have decided that my gemlog should be the source
of truth for my blog. I’ve written some little bash scripts to convert
everything to html and atom feed as well, but I’m actually not very
motivated anymore to care for website design. Gemtext is the simplest
markup language I know and to keep it simple makes the most sense to
me.
I started writing on wordpress.com; without running my own server it
has been the most accessible platform to me. When moving to my own
infrastructure I used Lektor, a static website generator framework
written in Python. It has been quite nice and powerful, but in the end I
wanted to get rid of the extra dependencies and simplify even more.
Rarely. If I write, I just write. Basically the same way I would
talk. There were a very few posts when I did some research because I
wanted to make it a useful and comprehensive source for future look-ups,
but in most cases I’m simply too lazy. I don’t spend much time on
structure or thinking about how to guide the reader through my thoughts,
it’s just for me and anyone who cares.
5. When do you feel
most inspired to write?
Always in situations when I don’t have the time to write, never when
I do have the time. Maybe there’s something wrong with me.
6.
Do you publish immediately after writing or do you let it simmer a bit
as a draft?
Yes, mostly. I do have a couple of posts that I didn’t publish
immediately, so they are still not published. I find it hard to
re-iterate my own writing, so I try to avoid it by publishing
immediately :)
7. Your favorite post on your
blog?
The post I was looking up myself most often is the PostgreSQL
migration thing. It was a good idea to write that down ;)
8.
Any future plans for your blog? Maybe a redesign, changing the tag
system, etc.?
I just did a major refactoring of the system, basically doing
everying manually now. It forces me to keep things simple, because I
think it should be simple to write and publish a text online. I
also hope to have lowered the threshold for me to start writing new
posts. So piloting the current system, it is.
Yesterday I wrote about how
I am using a different tool for git signing and verification. Next, I
replaced my pass usage. I have a small
patch to use
stateless OpenPGP command line interface (SOP). It is an implementation
agonostic standard for handling OpenPGP messages. You can read the whole SPEC
here.
Installation
cargo install rsop rsop-oct
And copied the bash script from my repository to the path somewhere.
The rsoct binary from rsop-oct follows the same SOP standard but uses the
card to signing/decryption. I stored my public key in
~/.password-store/.gpg-key file, which is in turn used for encryption.
Usage
Here nothing changed related my daily pass usage, except the number of time I am typing my PIN :)
One of the power of Unix systems comes from the various small tools and how
they work together. One such new tool I am using for some time is for gitsigning & verification using OpenPGP and my Yubikey for the actual signing
operation via
openpgp-card-tool-git. I
replaced the standard gpg for this usecase with the oct-git command from this
project.
Installation & configuration
cargo install openpgp-card-tool-git
Then you will have to configuration your (in my case the global configuration) git configuration.
git config --global gpg.program <path to oct-git>
I am assuming that you already had it configured before for signing, otherwise
you have to run the following two commands too.
Conference attendance had taken a hit since the onset of the COVID-19 pandemic.
Though I attended many virtual conferences and was glad to present at a few
like FOSDEM - a conference I had always longed to present at.
Sadly, the virtual conferences did not have the feel of in-person conferences.
With 2024 here and being fully vaccinated, I started attending a few in-person
conferences. The year started with FOSSASIA in Hanoi, Vietnam, followed by a
few more over the next few months.
December 2024 was going to be special as we were all waiting for the first
edition of KubeCon + CloudNativeCon in India. I had planned to attend the EU/NA
editions of the conference, but visa issues made those more difficult to
attend. As fate would have it, India was the one planned for me.
KubeCon + CloudNativeCon India 2024 took place in the capital city, Delhi,
India from 11th - 12th December 2024, along with co-events hosted at the same
venue, Yashobhoomi Convention Centre on 10th December 2024.
Venue
Let’s start with the venue. As a conference organizer for other conferences,
the thing that blew my mind was the venue, YASHOBHOOMI (India International
Convention and Expo Centre). The conference venue was huge to accommodate large
scale conferences, and I also got to know that the convention centre is still in
progress and there are more halls to come. If I heard correctly, there was another
parallel conference running in the venue around the same time.
Now, let’s jump to the conference.
Maintainer Summit
The first day of the conference, 10th December 2024, was the CNCF Maintainers
Summit. The event is exclusive for people behind CNCF projects, providing space
to showcase their projects and meet other maintainers face-to-face.
Due to the chilly and foggy morning, the event started a bit late to
accommodate more participants for the very first talk. The event had a total of
six talks, including the welcome note. Our project, Flatcar Container Linux,
also had a talk accepted: “A Maintainer’s Odyssey: Time, Technology and
Transformation”.
This talk took attendees through the journey of Flatcar Container Linux from a
maintainer’s perspective. It shared Flatcar’s inspiration - the journey from a
“friendly fork” of CoreOS Container Linux to becoming a robust, independent,
container-optimized Linux OS. The beginning of the journey shared the daunting
red CI dashboard, almost-zero platform support, an unstructured release
pipeline, a mammoth list of outdated packages, missing support for ARM
architecture, and more – hardly a foundation for future initiatives. The talk
described how, over the years, countless human hours were dedicated to
transforming Flatcar, the initiatives we undertook, and the lessons we learned
as a team. A good conversation followed during the Q&A with questions about
release pipelines, architectures, and continued in the hallway track.
During the second half, I hosted an unconference titled “Special Purpose
Operating System WG (SPOS WG) / Immutable OSes”. The aim was to discuss the WG
with other maintainers and enlighten the audience about it. During the session,
we had a general introduction to the SPOS WG and immutable OSes. It was great
to see maintainers and users from Flatcar, Fedora CoreOS, PhotonOS, and Bluefin
joining the unconference. Since most attendees were new to Immutable OSes, many
questions focused on how these OSes plug into the existing ecosystem and the
differences between available options. A productive discussion followed about
the update mechanism and how people leverage the minimal management required
for these OSes.
I later joined the Kubeflow unconference. Kubeflow is a Kubernetes-native
platform that orchestrates machine learning workflows through custom
controllers. It excels at managing ML systems with a focus on creating
independent microservices, running on any infrastructure, and scaling workloads
efficiently. Discussion covered how ML training jobs utilize batch processing
capabilities with features like Job Queuing and Fault Tolerance - Inference
workloads operate in a serverless manner, scaling pods dynamically based on
demand. Kubeflow abstracts away the complexity of different ML frameworks
(TensorFlow, PyTorch) and hardware configurations (GPUs, TPUs), providing
intuitive interfaces for both data scientists and infrastructure operators.
Conference Days
During the conference days, I spent much of my time at the booth and doing
final prep for my talk and tutorial.
On the maintainers summit day, I went to check the room for the conference
days, but discovered that room didn’t exist in the venue. So, on the conference
days, I started by informing the organizers about the schedule issue. Then, I
proceeded to the keynote auditorium, where Chris Aniszczyk, CTO, Linux
Foundation (CNCF), kicked off the conference by sharing updates about the Cloud
Native space and ongoing initiatives. This was followed by Flipkart’s keynote
talk and a wonderful, insightful panel discussion. Nikhita’s keynote on “The
Cloud Native So Far” is a must-watch, where she talked about CNCF’s journey
until now.
After the keynote, I went to the speaker’s room, prepared briefly, and then
proceeded to the community booth area to set up the Flatcar Container Linux
booth. The booth received many visitors. Being alone there, I asked Anirudha
Basak, a Flatcar contributor, to help for a while. People asked all
sorts of questions, from Flatcar’s relevance in the CNCF space to how it works
as a container host and how they could adapt Flatcar in their infrastructure.
Around 5 PM, I wrapped up the booth and went to my talk room to present
“Effortless Clustering: Rethinking ClusterAPI with Systemd-Sysext”. The talk
covered an introduction to systemd-sysext, Flatcar & Cluster API. It then
discussed how the current setup using Image Builder poses many infrastructure
challenges, and how we’ve been utilizing systemd to resolve these challenges
and simplify using ClusterAPI with multiple providers. The post-talk
conversation was engaging, as we discussed sysext, which was new to many
attendees, leading to productive hallway track discussions.
Day 2 began with me back in the keynote hall. First up were Aparna & Sumedh
talking about Shopify using GenAI + Kubernetes for workloads, followed by
Lachie sharing the Kubernetes story with Mandala and Indian contributors as the
focal point. As an enthusiast photographer, I particularly enjoyed the talk
presented through Lachie’s own photographs.
Soon after, I proceeded to my tutorial room. Though I had planned to follow the
Flatcar tutorial we have, the AV setup broke down after the introductory start,
and the session turned into a Q&A. It was difficult to regain momentum. The
middle section was filled mostly with questions, many about Flatcar’s security
perspective and its integration. After the tutorial wrapped up, lunch time was
mostly taken up by hallway track discussions with tutorial attendees. We had
the afternoon slot on the second day for the Flatcar booth, though attendance
decreased as people began leaving for the conference’s end. The range of
interactions remained similar, with some attendees from talks and workshops
visiting the booth for longer discussions. I managed to squeeze in some time to
visit the Microsoft booth at the end of the conference.
Overall, I had an excellent experience, and kudos to the organizers for putting
on a splendid show.
Takeaways
Being at a booth representing Flatcar for the first time was a unique
experience, with a mix of people - some hearing about Flatcar for the first
time and confusing it with container images, requiring explanation, and others
familiar with container hosts & Flatcar bringing their own use cases. Questions
ranged from update stability to implementing custom modifications required by
internal policies, SLSA, and more. While I’ve managed booths before, this was
notably different. Better preparation regarding booth displays, goodies, and
Flatcar resources would have been helpful.
The talk went well, but presenting a tutorial was a different experience. I had
expected hands-on participation, having recently conducted a successful similar
session at rootconf. However, since most KubeCon attendees didn’t bring
computers, I plan to modify my approach for future KubeCon tutorials.
At the booth, I also received questions about WASM + Flatcar, as Flatcar was
categorized under WASM in the display.
We will need .env.docker file and modify it
as required, specially the following, you will have to write the values for each one of them.
APP_NAME=
APP_DOMAIN=
OPEN_REGISTRATION="false"   # because personal site
ENFORCE_EMAIL_VERIFICATION="false" # because personal site
DB_PASSWORD=

# Extra values to db itself
MYSQL_DATABASE=
MYSQL_PASSWORD=
MYSQL_USER=

CACHE_DRIVER="redis"
BROADCAST_DRIVER="redis"
QUEUE_DRIVER="redis"
SESSION_DRIVER="redis"

REDIS_HOST="redis"

ACITIVITY_PUB="true"

LOG_CHANNEL="stderr"
The actual docker compose file:
---

services:
  app:
    image: zknt/pixelfed:2025-01-18
    restart: unless-stopped
    env_file:
      - ./.env
    volumes:
      - "/data/app-storage:/var/www/storage"
      - "./.env:/var/www/.env"
    depends_on:
      - db
      - redis
    # The port statement makes Pixelfed run on Port 8080, no SSL.
    # For a real instance you need a frontend proxy instead!
    ports:
      - "8080:80"

  worker:
    image: zknt/pixelfed:2025-01-18
    restart: unless-stopped
    env_file:
      - ./.env
    volumes:
      - "/data/app-storage:/var/www/storage"
      - "./.env:/var/www/.env"
    entrypoint: /worker-entrypoint.sh
    depends_on:
      - db
      - redis
      - app
    healthcheck:
      test: php artisan horizon:status | grep running
      interval: 60s
      timeout: 5s
      retries: 1

  db:
    image: mariadb:11.2
    restart: unless-stopped
    env_file:
      - ./.env
    environment:
      - MYSQL_ROOT_PASSWORD=CHANGE_ME
    volumes:
      - "/data/db-data:/var/lib/mysql"

  redis:
    image: zknt/redis
    restart: unless-stopped
    volumes:
      - "redis-data:/data"

volumes:
  redis-data:
I am using nginx as the reverse proxy. Only thing to remember there is to
pass .well-known/acme-challenge to the correct directory for letsencrypt,
the rest should point to the contianer.
I’m Nabarun Pal, also known as palnabarun or theonlynabarun, a distributed systems engineer and open source contributor with a passion for building resilient infrastructure and fostering collaborative communities. Currently, I work on Kubernetes and cloud-native technologies, contributing to the ecosystem that powers modern distributed applications.
When I’m not deep in code or community discussions, you can find me planning my next adventure, brewing different coffee concoctions, tweaking my homelab setup, or exploring new mechanical keyboards. I believe in the power of open source to democratize technology and create opportunities for everyone to contribute and learn.
A detailed view of my speaking engagements are in the /speaking page.
Since the very inception of my journey in Python and PyLadies, I have always thought of having a PyLadies Conference, a celebration of PyLadies. There were conversations here and there, but nothing was fruitful then. In 2023, Mariatta, Cheuk, Maria Jose, and many more PyLadies volunteers around the globe made this dream come true, and we had our first ever PyLadiesCon.
I submitted a talk for the first-ever PyLadiesCon (how come I didn&apost?), and it was rejected. In 2024, I missed the CFP deadline. I was sad. Will I never be able to participate in PyLadiesCon?
On October 10th, 2024, I had my talk at PyCon NL. I woke up early to practice. I saw an email from PyLadiesCon, titled "Invitation to be a Keynote Speaker at PyLadiesCon". The panic call went to Kushal Das. "Check if there is any attack in the Python server? I got a spamming email about PyLadiesCon and the address is correct. "No, nothing.", replied Kushal after checking. Wait then "WHAT???". PyLadiesCon wants me to give the keynote. THE KEYNOTE in PyLadiesCon.
Thank you Audrey for conceptualizing and creating PyLadies, our home.
And here I am now. I will give the keynote on 7 December 2024 at PyLadiesCon on how PyLadies gave me purpose. See you all there.
“It has been 10 years!“ I was not able to get over the fact that I have been attending PyCon India for 10 years now and the fact that it happened at NIMHANS made it even more special because it’s the same place where this journey started.
I attended ...
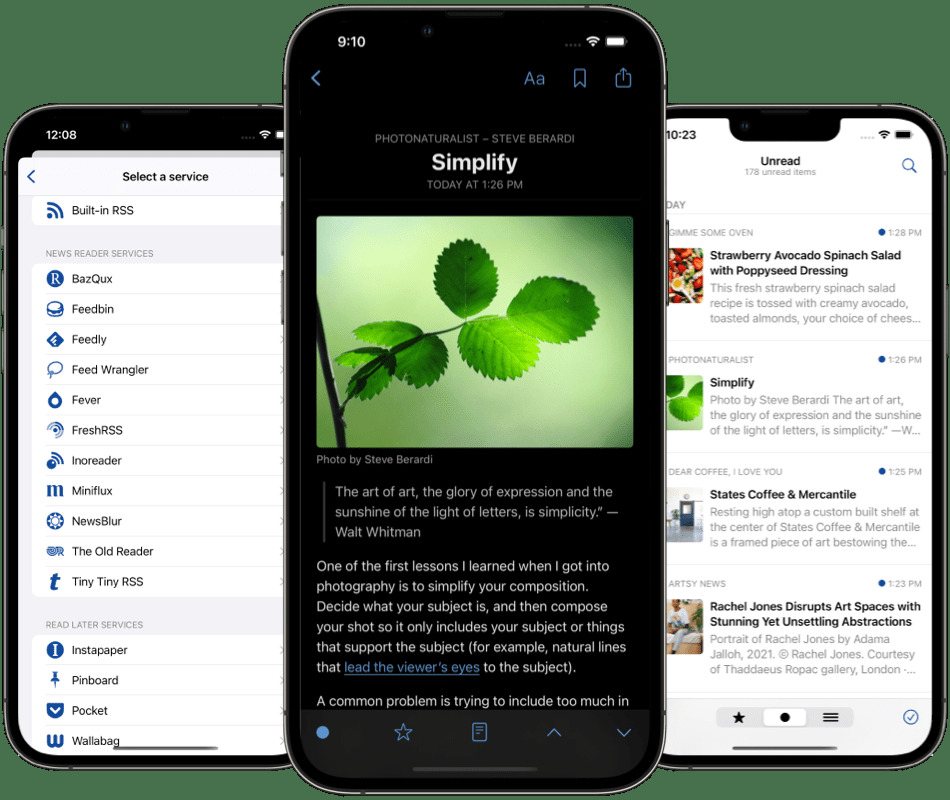


 Updated JSON